
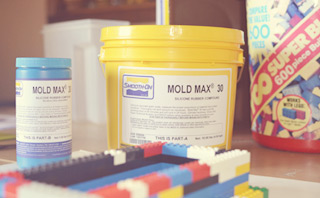
Mold Max 30
My creative team at Murena Films and myself needed to make some molds of weapons so we could make props that would kill a “Zombie” in our feature film, “Chip & Bernie’s Zomance”. We made them props so we would not kill any of the actors on accident. It is getting tougher to dispose of bodies nowadays.
Being that neither one of us had done this before we were experimenting and try to figure out what was the easiest way to do it. We used the Smooth-On, pink silicone rubber compound, called Mold Max® 30. It comes in two parts, Part A and Part B.
Step 1: The Object
Your first step in making a silicone mold is to decide what you are going to mold. Celery? Your sister’s new iPhone? Or in our case a knife that would be thrown at a zombie’s head and the handle would be sticking out.
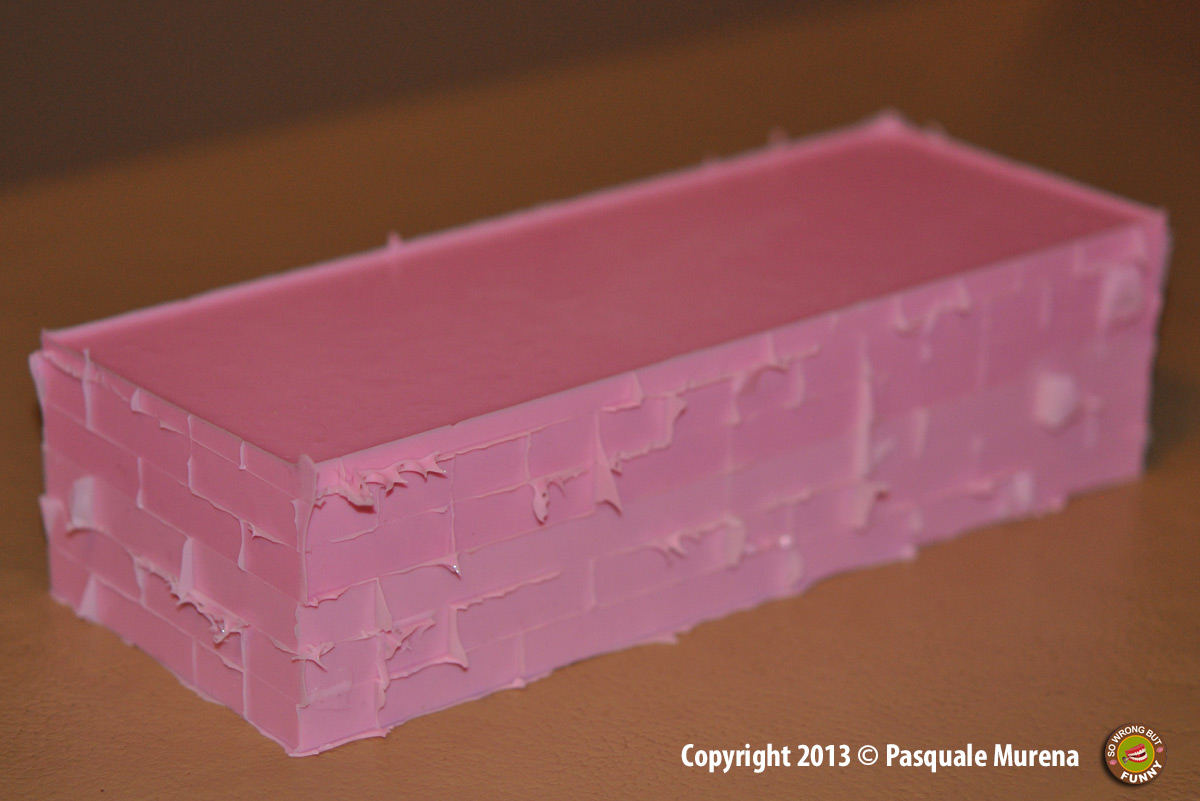
Step 2: The Frame
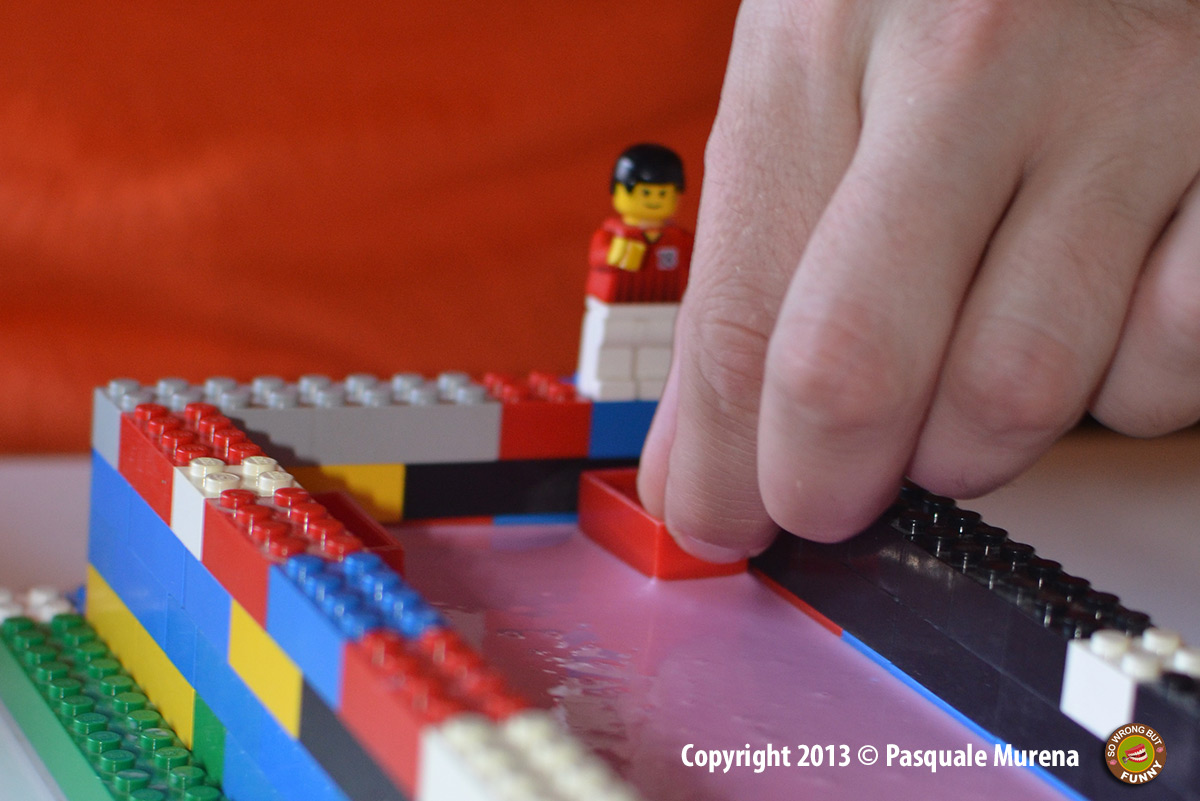
You can use almost anything for this, a shoebox lined with plastic, Tupperware and more but we came up with the idea of using Legos. Legos can be made into any size you need it to be and do not leak the silicone when pushed together.
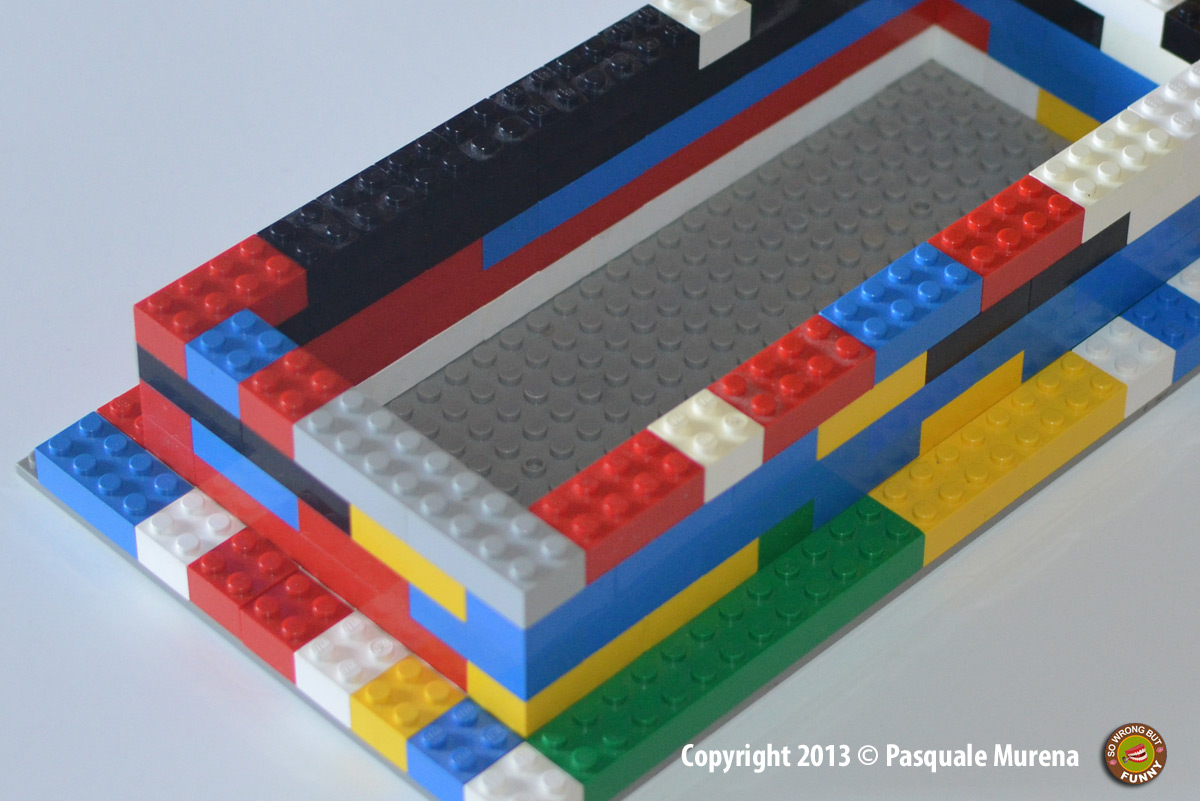
Lego mold case
NOTE: Make sure your object has at least 1-inch space on all sides
Step 3: The Measurement
Rice, beads, Skittles-anything will work. We used the musical fruit! Depending on the type of mold you do you can have a one or two-phase process. One-Phase you cover the enter object then cut it out, two-phase you make two different molds that connect, we did two pieces for this one so we only measured half way.
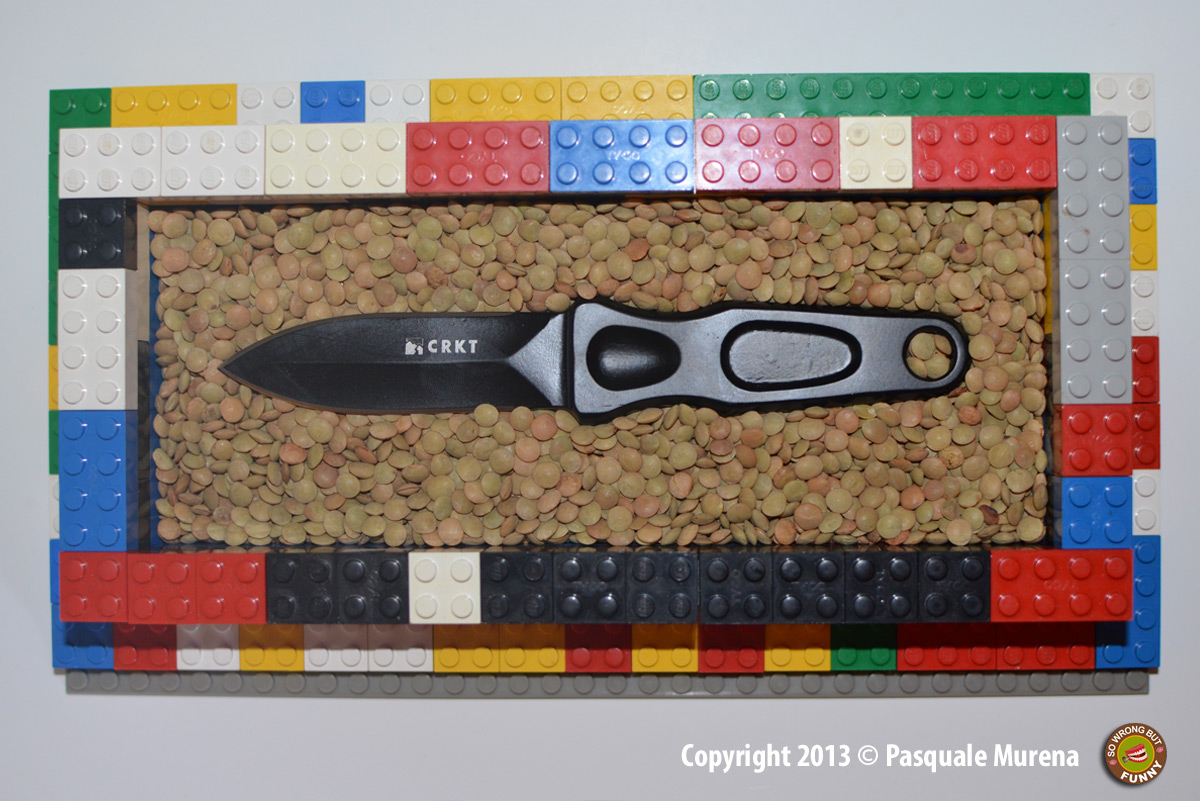
Lentils used to measure how much Mold Max to use
Next, make sure you mix Part B of Mold Max 30 (the red one) thoroughly because a lot of the active ingredients settle to the bottle of the container and will not work properly if not done properly.
With your measurements mix Part A and Part B together, a 10 to 1 ratio is what Mold Max 30 requires. Example: 10 cups of Part A and 1 cup of Part B. Mix this thoroughly until you no longer see red or white but a pink color.
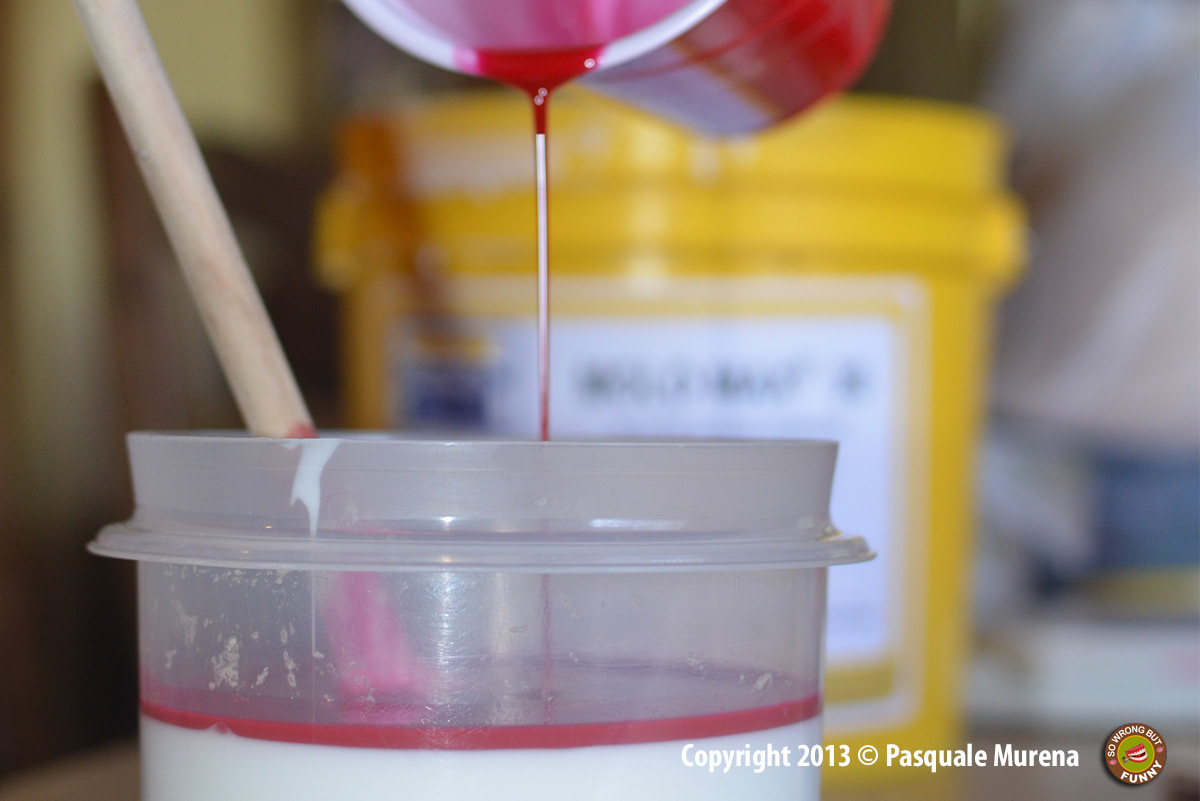
10 to 1 ratio
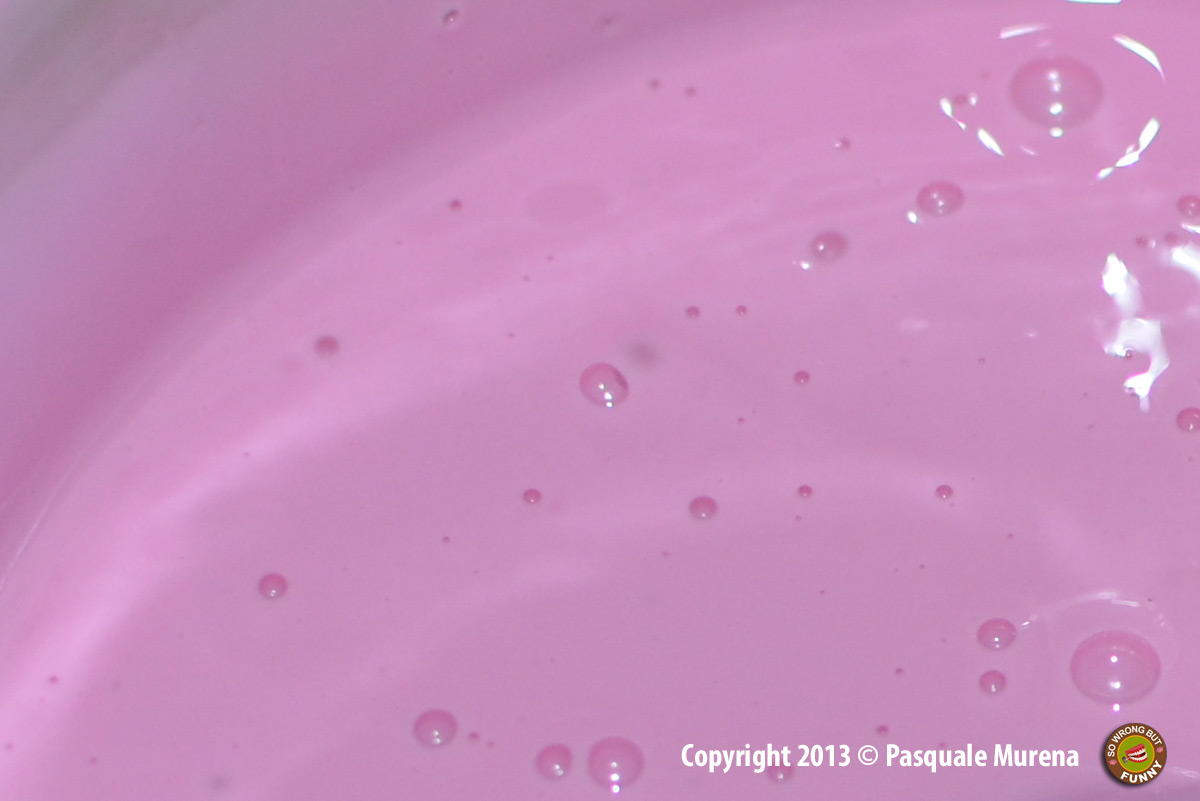
The perfect mold color
NOTE: Realize that you have a working time of 45 minutes, so prepare as much as possible before mixing.
Step 4: The Pouring
Pour the silicone into your frame-we realized that you have to let the silicone set a little before putting your object in or it would settle to the bottom, especially a heavy object like a knife. We even used sewing string to hold the knife in position, another reason Legos worked great.
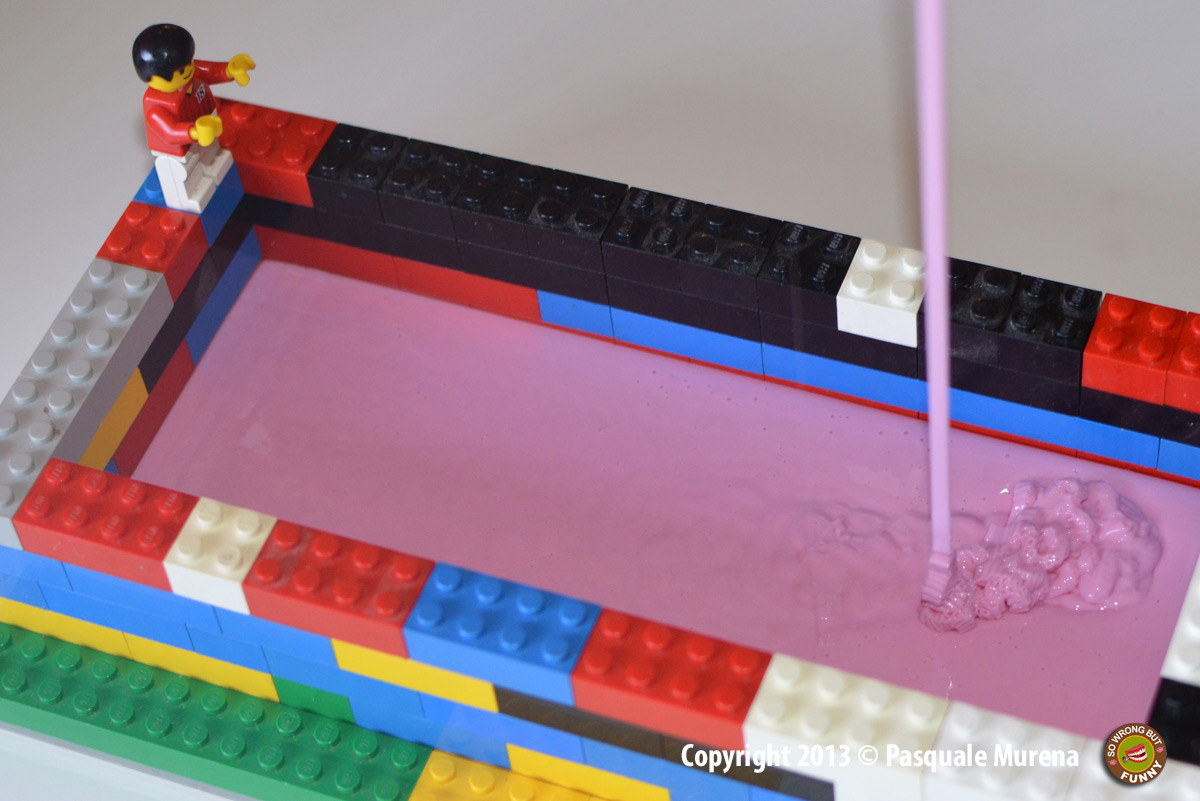
Get that Line for Best Results
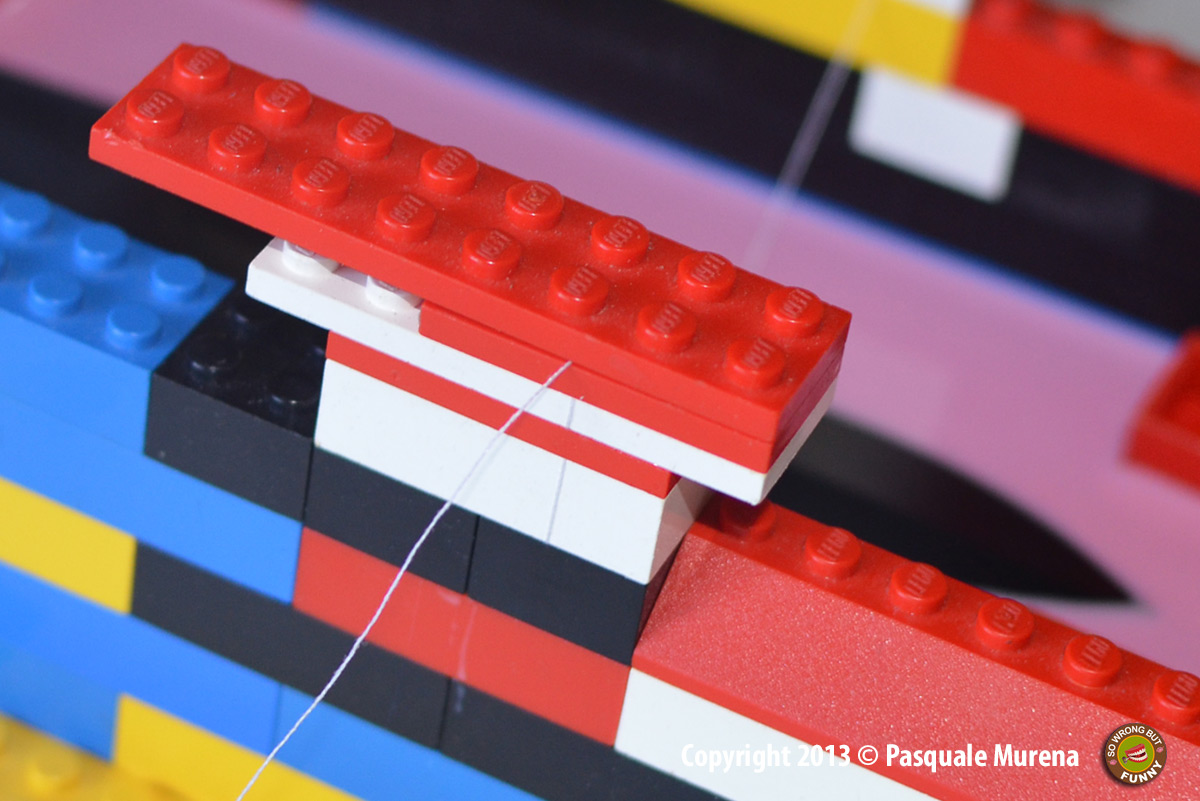
String Used to Hold Knife in Place
For two-phase silicone users place more Legos into the silicone so when it cures and we pour the next silicone base on top of it we have a mold that locks into place.
I Used Legos to Give Joints to Both Molds
Step 5: The Wait
Wait 24 hours for the silicone to cure entirely. If you are doing a one-phase process cut your object out and use your mold. If you are doing a two-phase process, repeat the steps and then tomorrow you can use your mold.
Final Result
This is a wonderful product and easy to use once you understand it. Remember to still read everything they supply with the product before using it and to keep it away from children. If you want to make a mold of a child you need serious help and belong in a “home.”
Good luck and if you have more tips for me and others post them below.
14 Comments on “5 Simple Steps to Mold Making”
Pingback: Sanchez
Great idea on the legos.
Smooth on needs better instructions, been looking for a site to help me out. thanks for the tips, this is my first time trying a mold.
Pingback: Thor
Thanks for the help.
Pingback: Lewis
Pingback: Melissa
Pingback: Laura
Pingback: Harold
I use this stuff all the time, so hard to use the first few times but now I have it down pretty good. I wish you had this written a few years back. Thanks.
THese are very helpful tips, I have ruined a big batch of this stuff already. 🙁
Try using a spatula for the mixing, makes it easier.
Nice tip Rob, thanks!
Photos helped a lot.